3.2.9 How to enable HTTP/2 protocol
The HTTP/2 protocol is a new version of the HTTP transport protocol for transferring website data on the Internet.
The main advantages of the new HTTP/2 protocol, compared to previous versions, are:
- Reduced network load;
- Low costs for data parsing;
- Improved performance;
- More efficient data processing between client and server;
- Backwards compatible with HTTP/1.x.
You can learn more about the operating principles and advantages of HTTP/2 in the following material.
Below we will look at ways to activate the use of HTTP/2 on shared hosting TheHost and on virtual/dedicated servers with the Nginx web server version 1.9.5 or newer.
Please note: Regardless of the server, the HTTP/2 protocol requires an SSL certificate connected to the site in order to function. Both commercial and free SSLs are suitable.
Important: when you enable HTTP/2 for at least one domain on your hosting/server, it is automatically activated for all other domains on the same IP address. This behavior cannot be changed, because it is associated with the technical principles of implementing this protocol.
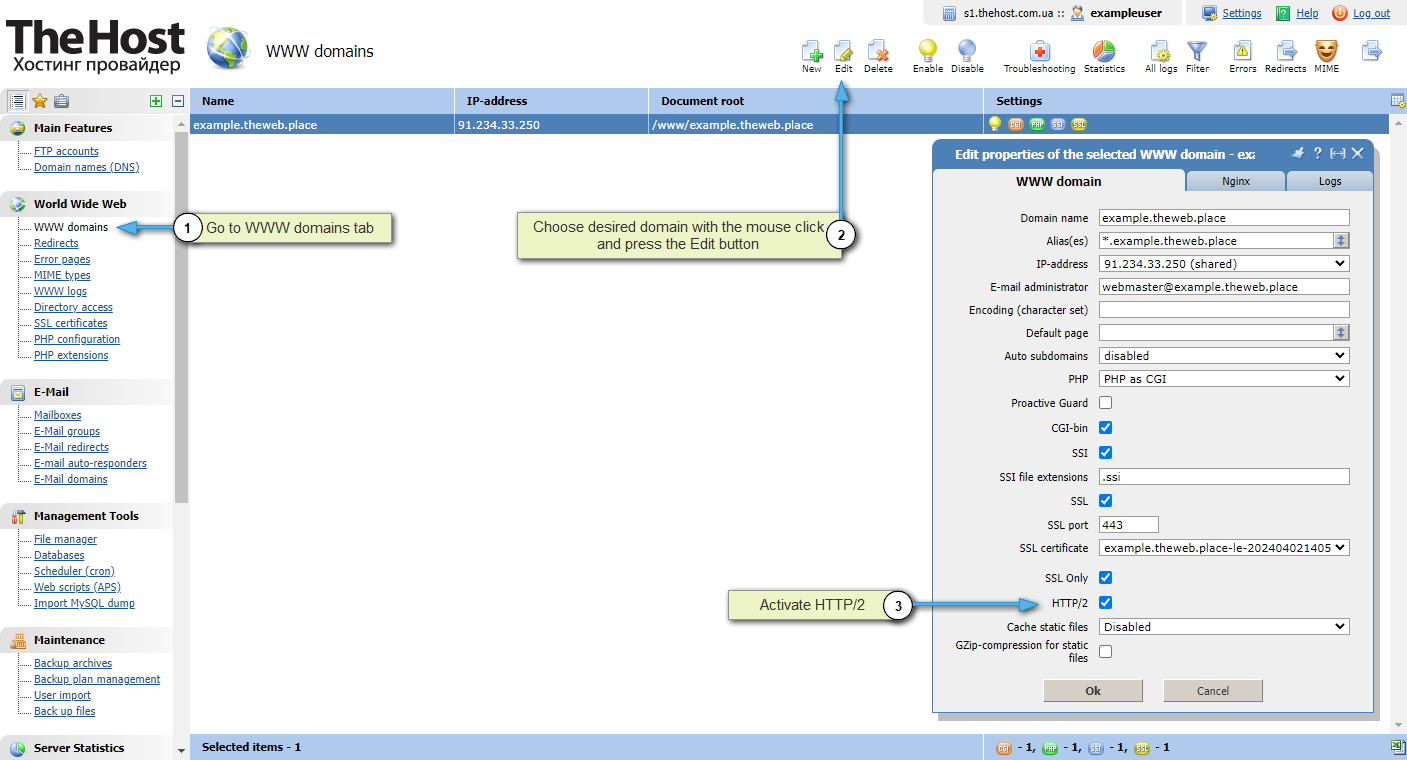
Enabling HTTP/2 protocol in hosting
Our hosting fully supports the use of HTTP/2. The only requirement for its activation is an SSL certificate connected to the site.
If the certificate is already installed, to activate HTTP/2, just check the appropriate box in the properties of your site, in the WWW domains tab:
Enabling HTTP/2 protocol on a server with NginX
If you are using our Ubuntu 18 template servers with ISPManager4 installed or later, your server supports HTTP/2 out of the box. The activation process will be similar to that on hosting; changes to the Nginx config will be made automatically.
If the image used is older, activation is performed as follows:
1. Connect via SSH and check the current Nginx version using the command:
- nginx -v
Outputnginx version: nginx/1.18.0 (Ubuntu)
If the Nginx version is lower than 1.9.5, it is absolutely not worth continuing to follow the instructions! This can lead to complete inoperability of the entire server.
2. Log in to the server control panel as superuser root.
3. Select the desired site in the WWW domains tab and open its properties using the Edit button. Make sure you have an SSL certificate connected to it.
4. Select the desired site with a mouse click and click Config in the upper right corner. This action will allow you to view and edit the Nginx config for the selected site.
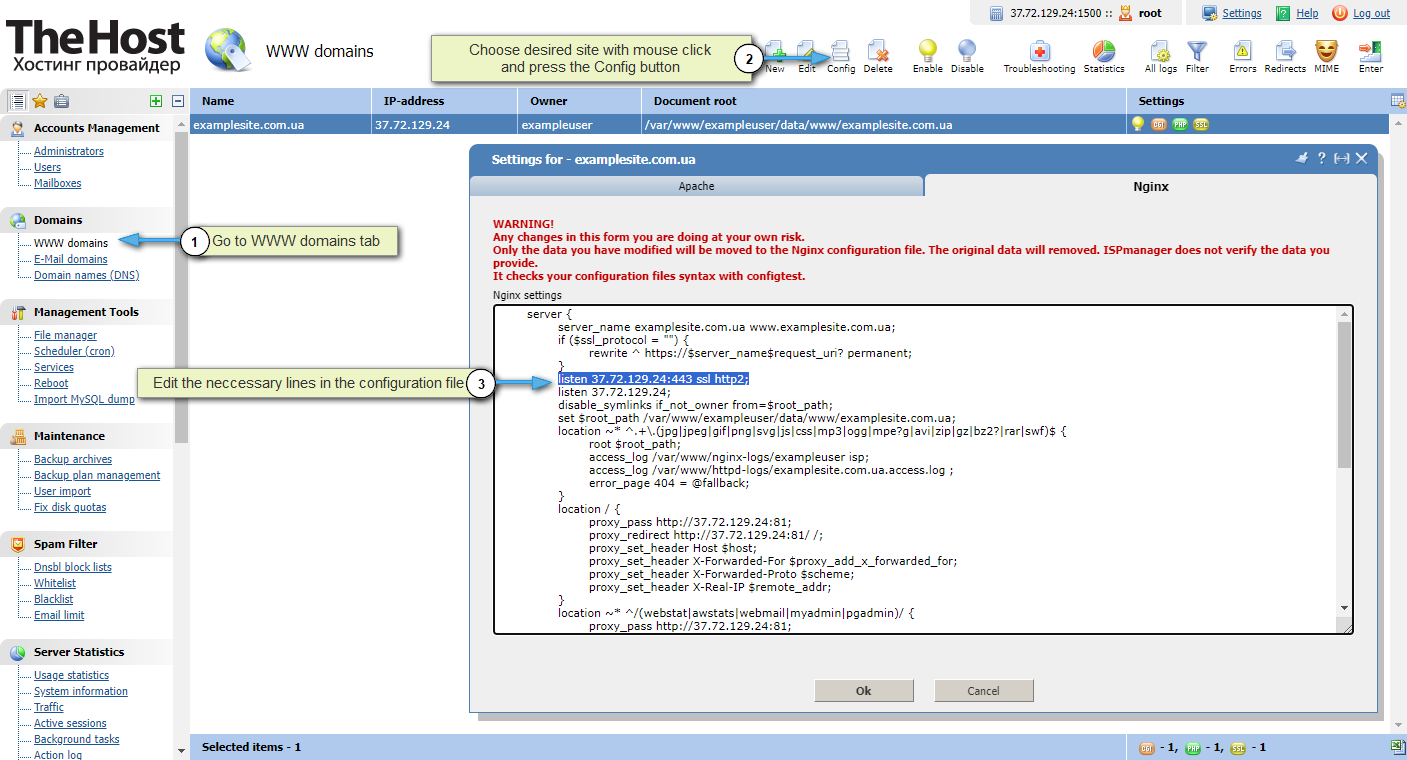
5. In the Nginx tab that opens, find the listen section:
Warning: IP address 37.72.129.24:443 is an example. The IP address of your server will be different and you do not need to edit its value!
...
   listen 37.72.129.24:443 ssl;
   listen 37.72.129.24;
...
Add the http2 directive to the block as follows:
...
   listen 37.72.129.24:443 ssl http2;
   listen 37.72.129.24;
...
And click Ok. If Nginx did not reboot automatically, reboot it in the Services tab.
Additionally: if your server does not have an ISPManager4 control panel, all of the above can be done in the same way by making text edits in the Nginx config (often located at /etc/nginx/nginx.conf). Make the above changes in the server block of the desired site and restart Nginx. For HTTP/2 to work, your server must meet technical requirements, including supporting ALPN.

